
I mentioned in the previous post that Citrix UPM/WEM appears to be trying to catch up with (and even possibly eclipse) FSLogix in the “profile container” area. Since the last version of FSLogix added native compaction of VHD/VHDX files, something users had wanted for a while and which I wrote about here, it seems a sensible progression that UPM should want to add it too.
For posterity, the “container” files that UPM (and FSLogix) use to encapsulate the user profile, or parts of it, are VHD or VHDX files that are mounted across the network and addressed as if they are local storage. The problem is, these files can grow dynamically (so they expand as users add content to them), but they cannot compact dynamically. The upshot is, if a user adds 10GB of data, for instance, to their container and then removes it, 10GB of the container on your storage is now effectively “white space”. Whilst UPM and FSLogix are sensible enough to write to this “white space” first, you could effectively be paying for storage space that is essentially blank. Particularly in cloud or hosted environments, this could be a bad thing.
Previously there were many scripts that could do compaction for you, but obviously it would be much better to have this native to the tooling. FSLogix introduced it in their last update, and with version 2303, Citrix UPM now has it too.
Enabling the compaction
As with most of UPM features, what you need to do is update to the latest agent version on your endpoints and also update your Group Policy Central Store with the new ADMX files (you can miss this step out if you are using Citrix to deploy the policies, however).
In the policies, under “Profile container settings” there should now be a setting called “Enable VHD disk compaction” which you will want to turn on

If you then switch to the “Advanced settings” tab instead, you will see three additional settings that allow you to more granularly configure when profile compaction will run.
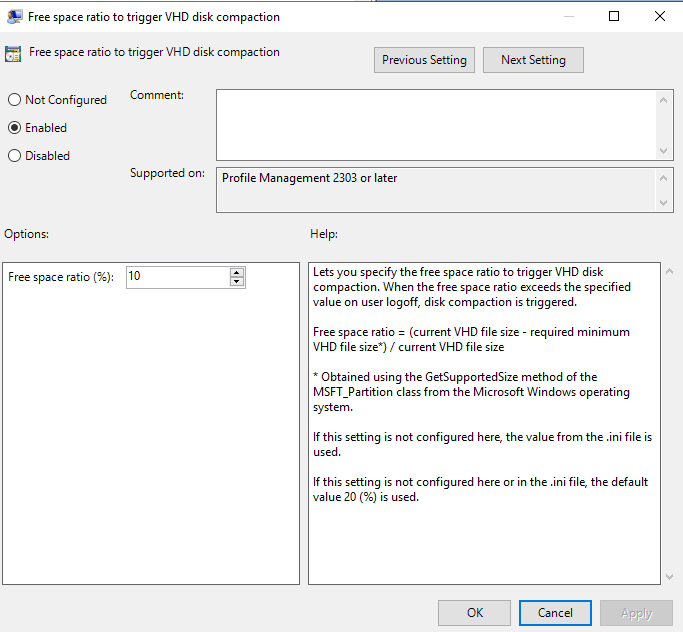
“Free space ratio to trigger VHD disk compaction” should be set to a percentage value. When the free (or “white”) space in a VHD file exceeds the percentage configured at logoff, compaction will start. So if a user has a 10GB VHD file with 1.1GB of white space and the percentage is configured at 10%, compaction would run at logoff.
“Number of logoffs to trigger VHD disk compaction” lets you set compaction to run every x logoffs. For example, if you set this to 2, it would run every time the “logoff since the last compaction” value reached 2. So in effect every second logoff.

If the percentage value and the number of logoffs value are both set, compaction will run when either of them meet the required threshold. However it would be nice to be able to blend these two settings together, so you can configure “run compaction when either threshold is met” or “run compaction only when both thresholds are met”, which would allow for more granular control.
Also, it would be great to see a feature that says “only run compaction during specified maintenance window” and also allow this to be blended with the others, so you can get much more control over when compaction is running.
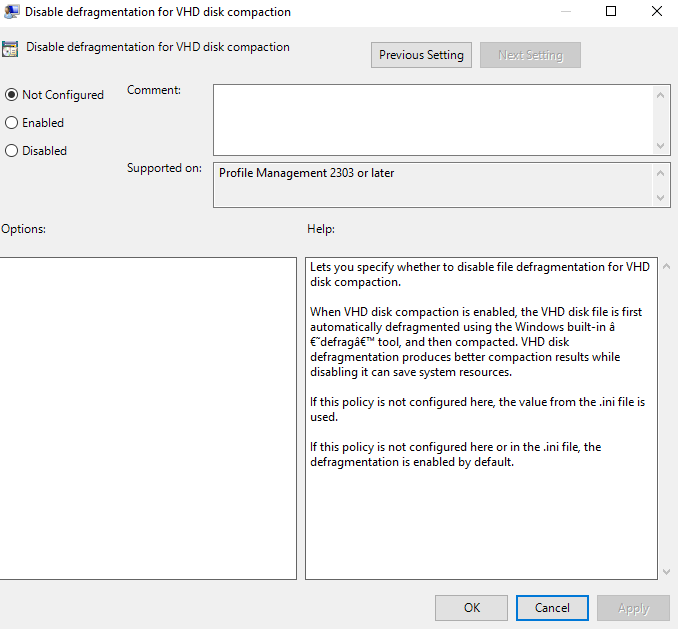
The final available setting is “Disable defragmentation for VHD disk compaction”. By default, the VHD/VHDX is first defragmented using the built-in Windows defrag tool. Defragging the VHD/VHDX first allows better compaction, but also uses more resources at logoff. If you wish to reduce this contention or you are seeing extended logoffs after enabling this, then activating this policy setting may mitigate against it.
It goes without saying that if you wish to use the defragmentation feature, then the Windows service “Optimize drives” (also known as “defragsvc” ) needs to be running. Some optimization tools turn it off.
Once you have all these policies configured and the new UPM agent installed on your endpoints, it should be a simple matter of testing.
Testing
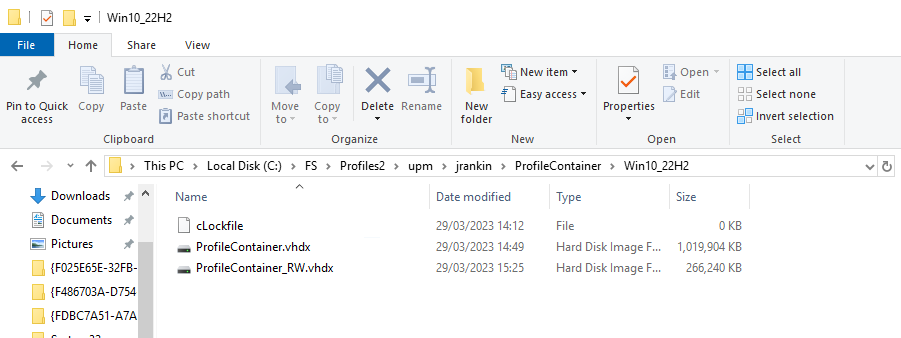
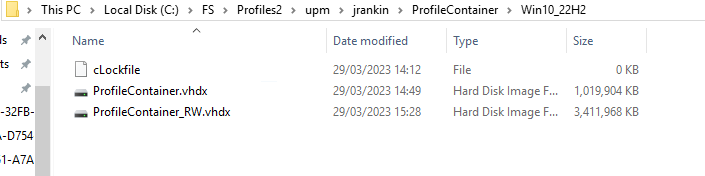
So we have logged on to a UPM-enabled machine using the Profile Container feature (it obviously goes without saying the UPM Profile Container feature must be set!) We can see the user has a container in the file store which is over 1GB in size with a 200MB+ diff file (the container is probably so big because I was testing the new UWP version of Teams earlier on)
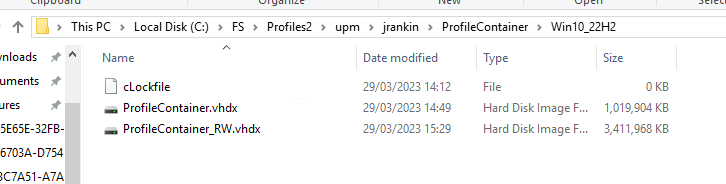
Let’s drop a big file onto the user’s Desktop (which is not redirected or excluded therefore part of the container)
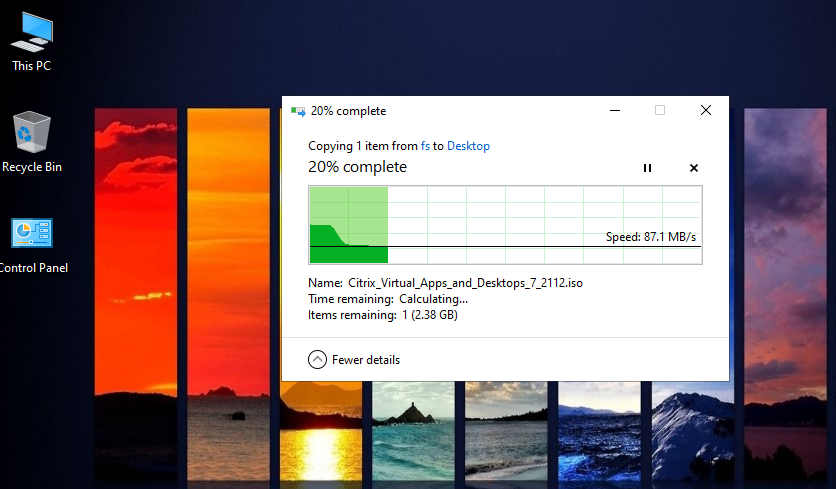
Once it is copied, we can see the container size has increased (the diff file is now 3.4GB)
If we then delete the file we just copied, we can also see the total size of the container files has not changed at all, despite the removal of 3GB+ from the profile
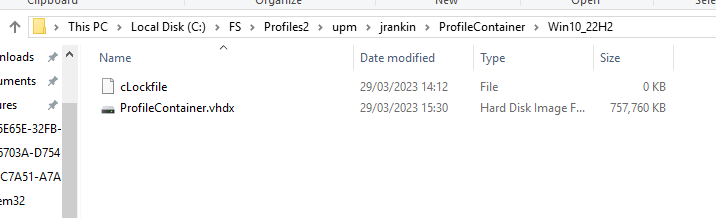
However, if we then log out, the compaction should automatically activate, so let’s log off

And straight away in the file store we can see that the profile has not just recouped the free space from the file we just deleted, it has also compressed even further, indicating that the new UWP version of Teams does exactly the same thing as its predecessor 🙁
Summary
So, 2303 brings yet another new feature for UPM (and there are some others I still need to blog about as well!) This is a good feature as it gives us a bit more flexibility with the compaction features than we get with FSLogix, which has its controls hard-coded.
As mentioned in the article, I’d love to see some more controls that you can mix and match for your environments – let’s see what the future development brings.
![]()
Very nice.
Hi,
Does the “VHD compaction” feature work with the “exclusive access to VHD Profile container” feature on UPM version 2308?
Yes, all the “exclusive access” policy does is make sure that a single disk is used rather than an additional RW disk which is the default setting. Compaction should work fine with either setup.
We updated upm to version 2308 only in the VDI image and assigned new policy settings through Windows GPO, CVAD is still 2206. Exclusive access to VHD containers works successfully, but VHD disk compaction and VHD auto-expansion do not work.
I’d open a support case then
Hi James
Another great article. I’m just getting to grips with UPM and looking at (potentially) replacing FSLogix with it. I seem to be failing at this first hurdle though and disk compaction just isn’t working, even though we’ve got all the relevant GPO’s set up. I’ve got a 6GB VHDX and of that, 4GB is white space. The free space ration is set to 10% and the number of logoffs is set to 1. The Optimize Drive service is set to manual, but even when I set it to Automatic and it’s running, still no compaction. Any ideas what I’m missing? Thanks
Hi Phil
Sounds like you’ve done everything right – are the UPM Registry entries to enable compaction written OK to the test machine? Check in HKLM\Software\Policies\Citrix\UserProfileManager(HDX)
Yeah, they’re all there, although our registry say HKLM\Software\Policies\Citrix\UserProfileManager and not HKLM\Software\Policies\Citrix\UserProfileManager(HDX).
I’ve just knocked up a very quick POC for the time being and followed your other article https://james-rankin.com/articles/quickpost-getting-started-with-citrix-upm-containers/ for setting it all up
Hmmmm should all work OK then AFAIK.
Happy to jump on a call sometime if you want to work through it, you can get hold of me at kz20fl [at] gmail [dot] com (or you could try Citrix support 😉 )
Try enabling the “Microsoft Storage Spaces SMP” service.
Thanks James. Really appreciate that. I’ll play around with it for a bit longer and go from there. I’ll try Citrix first rather than bothering you, but may well reach out to you at some point. Thanks again. Phil
Hi James. Just a bit of an update on this. It looks like other GPO setting aren’t applying, namely the exclusion list for directories. We added the relevant one’s for Teams, but still getting massive profile bloat and on closer inspection, the exclusions are being ignored or not applied. I read this https://docs.citrix.com/en-us/profile-management/current-release/troubleshoot/common-issues.html#determine-which-policies-are-in-force which states “Use the UPMSettings.ini file to determine the Profile Management policies that are being applied”, but that UPMSettings.ini file isn’t being created in the users profile folder on the profile server. Any ideas why that wouldn’t be getting created?
I never use the .ini file – are you applying the policies through AD or Citrix Studio?
Hi James
I’m testing using UPM with profile container, instead of FSLogix,
and like others in this thread, disc compaction simple isn’t working in UPM 2308.
All the relevant UPM settings are configured and visible in the registry on the VDA.
The UPM Profile Container feature is working like a charme, except disc compaction.
From the eventlog on the VDA, I get these entries relevant to disc compaction, at user logoff:
“The storage optimizer successfully completed shrink estimation on userXXX-Profile”
“The storage optimizer successfully completed defragmentation on userXXX-Profile”
“The storage optimizer successfully completed retrim on userXXX-Profile”
To my knowledge the problem here is that retrim mode, only “sends down retrims without scanning for zero blocks or reclaiming unused blocks”
Perhaps the problem is that the disc compaction feature is using the retrim mode for optimizing the VHDX file, instead of one of the other modes available for optimizing a VHDX file, like Quick, Full, Pretrimmed or Prezeroed.
Through AD. Some of them are applying but not all of them. Weird one. I’ll log it with Citrix and see what they come back with.
Hello,
We are currently testing Container feature of UPM and we are at the point where we need to take a decision.
Should we go with the container or keep the standard upm profile that worked for years.
Any pros and cons blog post somewhere to help us?
Thanks a lot,
Chris
Containers will improve logon times, reduce performance overheads, etc. Generally I say containers for desktop sessions and file-based for published apps only (although it depends on the apps TBF).
Thanks a lot!