
Have you ever had to deliver a Linux-based VDI from Azure over Citrix? Well you’re missing out…..on a very long and frustrating setup process 🙂
We’ve been able to deliver Linux VDAs for a while now, but I’ve never had to dip my toes into them, until this last week. I didn’t expect it to be straightforward – after all, there are stacks of Linux distributions out there all with their own foibles and idiosyncracies – but neither did I expect it to be so drawn-out. More for my own sanity than anything else – as if I ever have to repeat this, I don’t want to go through all the fun again – I’ve chosen to document it here.
We’re delivering a Red Hat Enterprise Linux 8.x instance via Azure using the Citrix DaaS service and leveraging Machine Creation Services (MCS). If you’re doing different flavours or using on-premises infra/workers or different provisioning methods, you will need to edit this process to fit your needs.
Enable AHB and Red Hat Cloud Access
This is specific to me delivering RHEL as the operating system, so if you’re using a different distribution, this won’t matter. If you are wanting to do RHEL, though, it’s pretty vital 🙂
You need to sign into the Red Hat Customer Portal and add your Azure tenant/subscription ID, and then enable gold image access. If you don’t have an account, you can use a trial developer account as long as you don’t exceed the usage constraints.
Sign in and go to https://access.redhat.com/management/cloud. Switch to the Cloud Access tab
Add a provider and select the type (in our case it is Microsoft Azure). You will need to enter your Azure tenant/subscription ID and give it a nickname.
Next, click on the three dots next to the subscription you added and choose Activate Red Hat Gold Images. This will take a moment or two to process. You should see the “Gold Image Access” column switch to “Requested”. Within a few minutes it should hopefully change to “Granted” as shown below.
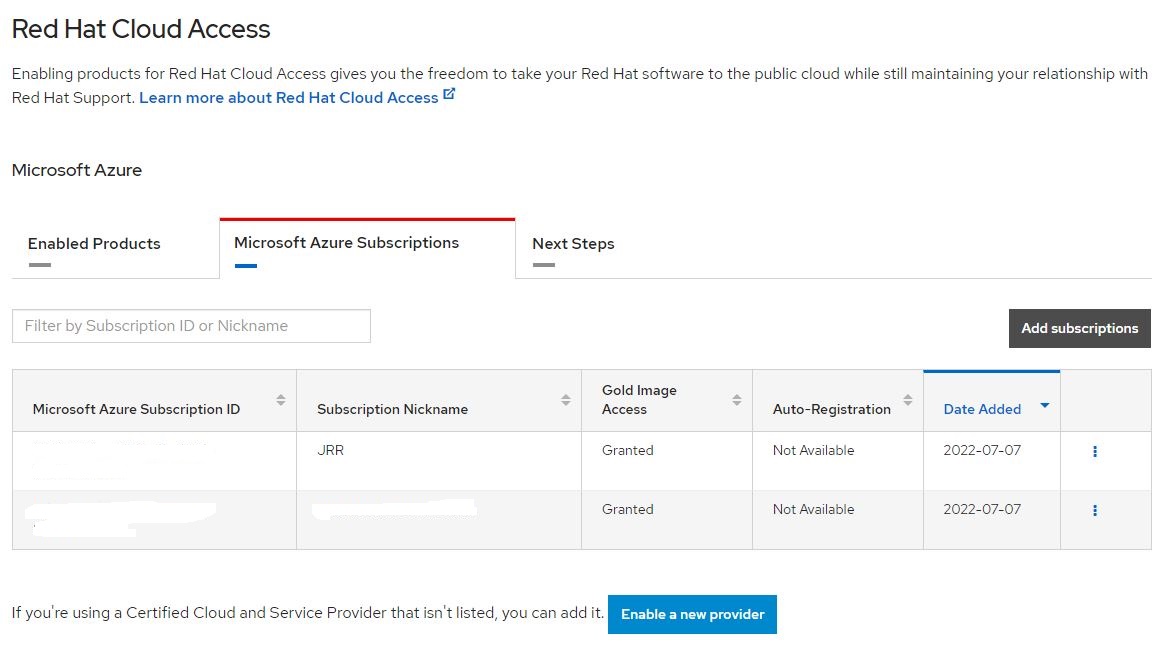
This will enable Azure Hybrid Access and allow you to select Red Hat licensing when you create a new VM using RHEL or configure an existing one.
Create a gold image
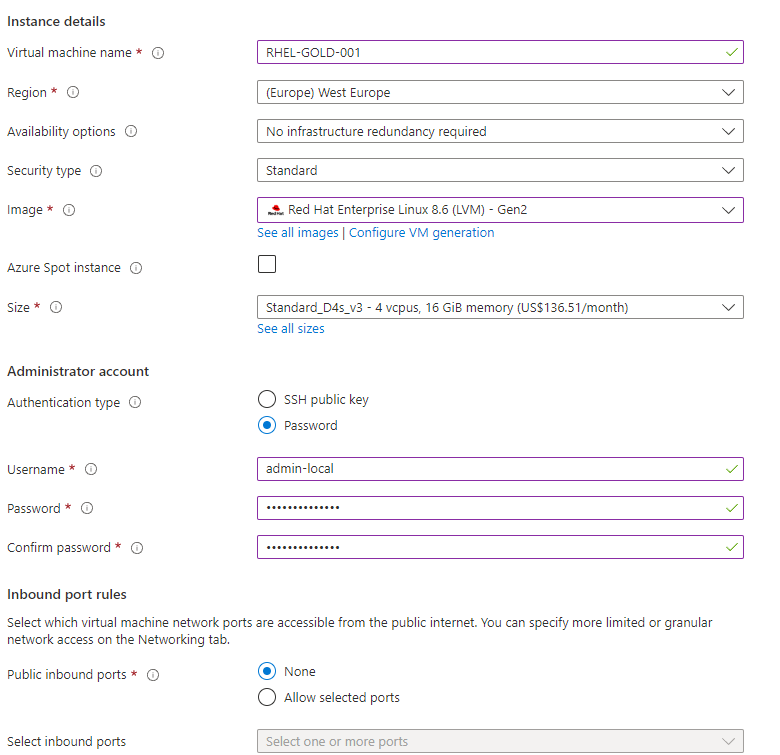
Yes, the first thing we need is obviously a golden image to deploy from. So let’s create one in Azure.
In the Azure console we obviously have lots of images to choose from, even for specific distributions, so pick the one you require. I’ve used RHEL 8.6 LVM Gen2 in this example. Also, I find the setup easier if you choose “Password” for Authentication as shown below.
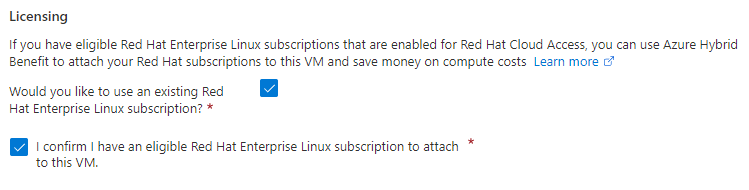
If you’ve successfully configured the Red Hat Cloud Access previously, you should see the above checkbox available for selection around Licensing. If you’re using an existing VM and wish to enable the AHB for Red Hat, then simply go to the VM, choose Configuration, and select the required options in the Licensing section

Create the VM with all of the other options as you require them, in terms of networking, storage, resource groups, etc. I enable Boot Diagnostics just so I can check that the GUI loads correctly. Be aware – you will need to make sure your golden image has internet access, as some of the steps in this guide require access to internet-based repositories.
Once the VM has successfully deployed you need to connect to the VM to configure it, I normally do this using the Bastion service.
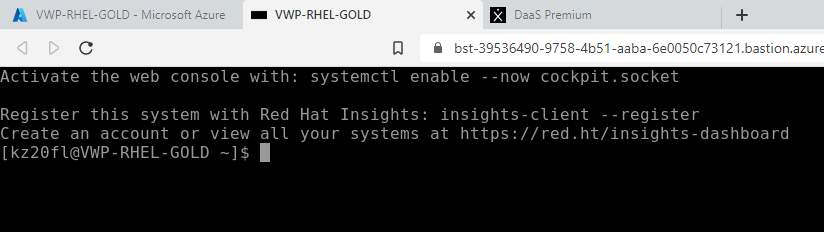
One thing that is important to mention if you’re a Windows admin sort of person, is that all Linux commands are case-sensitive.
Firstly I reset the root password
sudo -s
passwd root
At this point it would make sense to register your RHEL instance so you can get updates. Run this
subscription-manager registerSupply your Red Hat username (email) and password in order to register. Next, view your available subscriptions with this command
subscription-manager list --availableLook for the one that has .Net available within it, and make a note of the PoolID, as you will need it for the next command
subscription-manager attach --pool=[POOLID]Next we need to install a GUI front-end. There are stacks of ways you can do this and not being a huge Linux bod I’m not going to go into them all, but I will document the way I have done it for this image. Run the following commands
yum groupinstall "Workstation" -y
runlevel
this should show as N 3 below

Now run these commands
systemctl set-default graphical.target
systemctl status graphical.target
systemctl start graphical.target
systemctl status graphical.target
This should show the following output at the end

If you check the runlevel again by entering the “runlevel” command, it should now show 3 5 as below

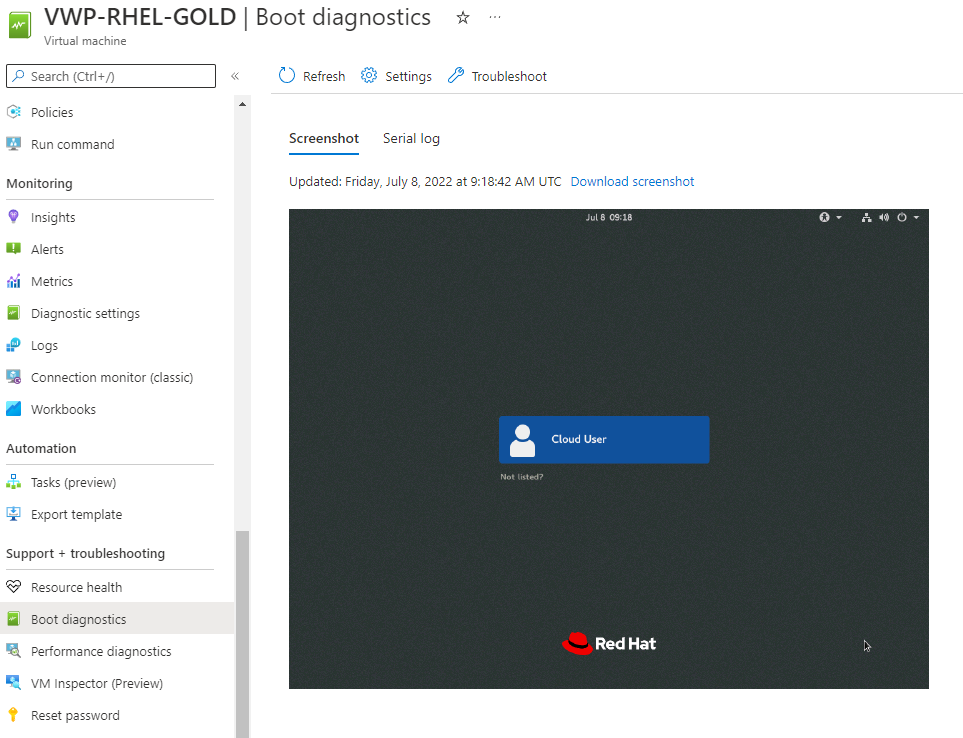
If you switch to the Boot Diagnostics tab in the Azure console, it should now show a GUI instead of a command line interface, as below
Now we need to get RDP-like access to the system. Run the following commands (again, there’s probably loads of other ways or methods you can achieve this, so please don’t bombard me with comments suggesting alternatives)
yum install -y https://dl.fedoraproject.org/pub/epel/epel-release-latest-8.noarch.rpm
yum install -y tigervnc-server xrdp
systemctl start xrdp
netstat -antup | grep xrdp
This last command should show the following output

Now run these commands
systemctl enable xrdp
firewall-cmd --permanent --add-port=3389/tcp
firewall-cmd --reload
You should now be able to log on to the machine via RDP using its IP address. Don’t know the IP address? Run the ifconfig command from the console.

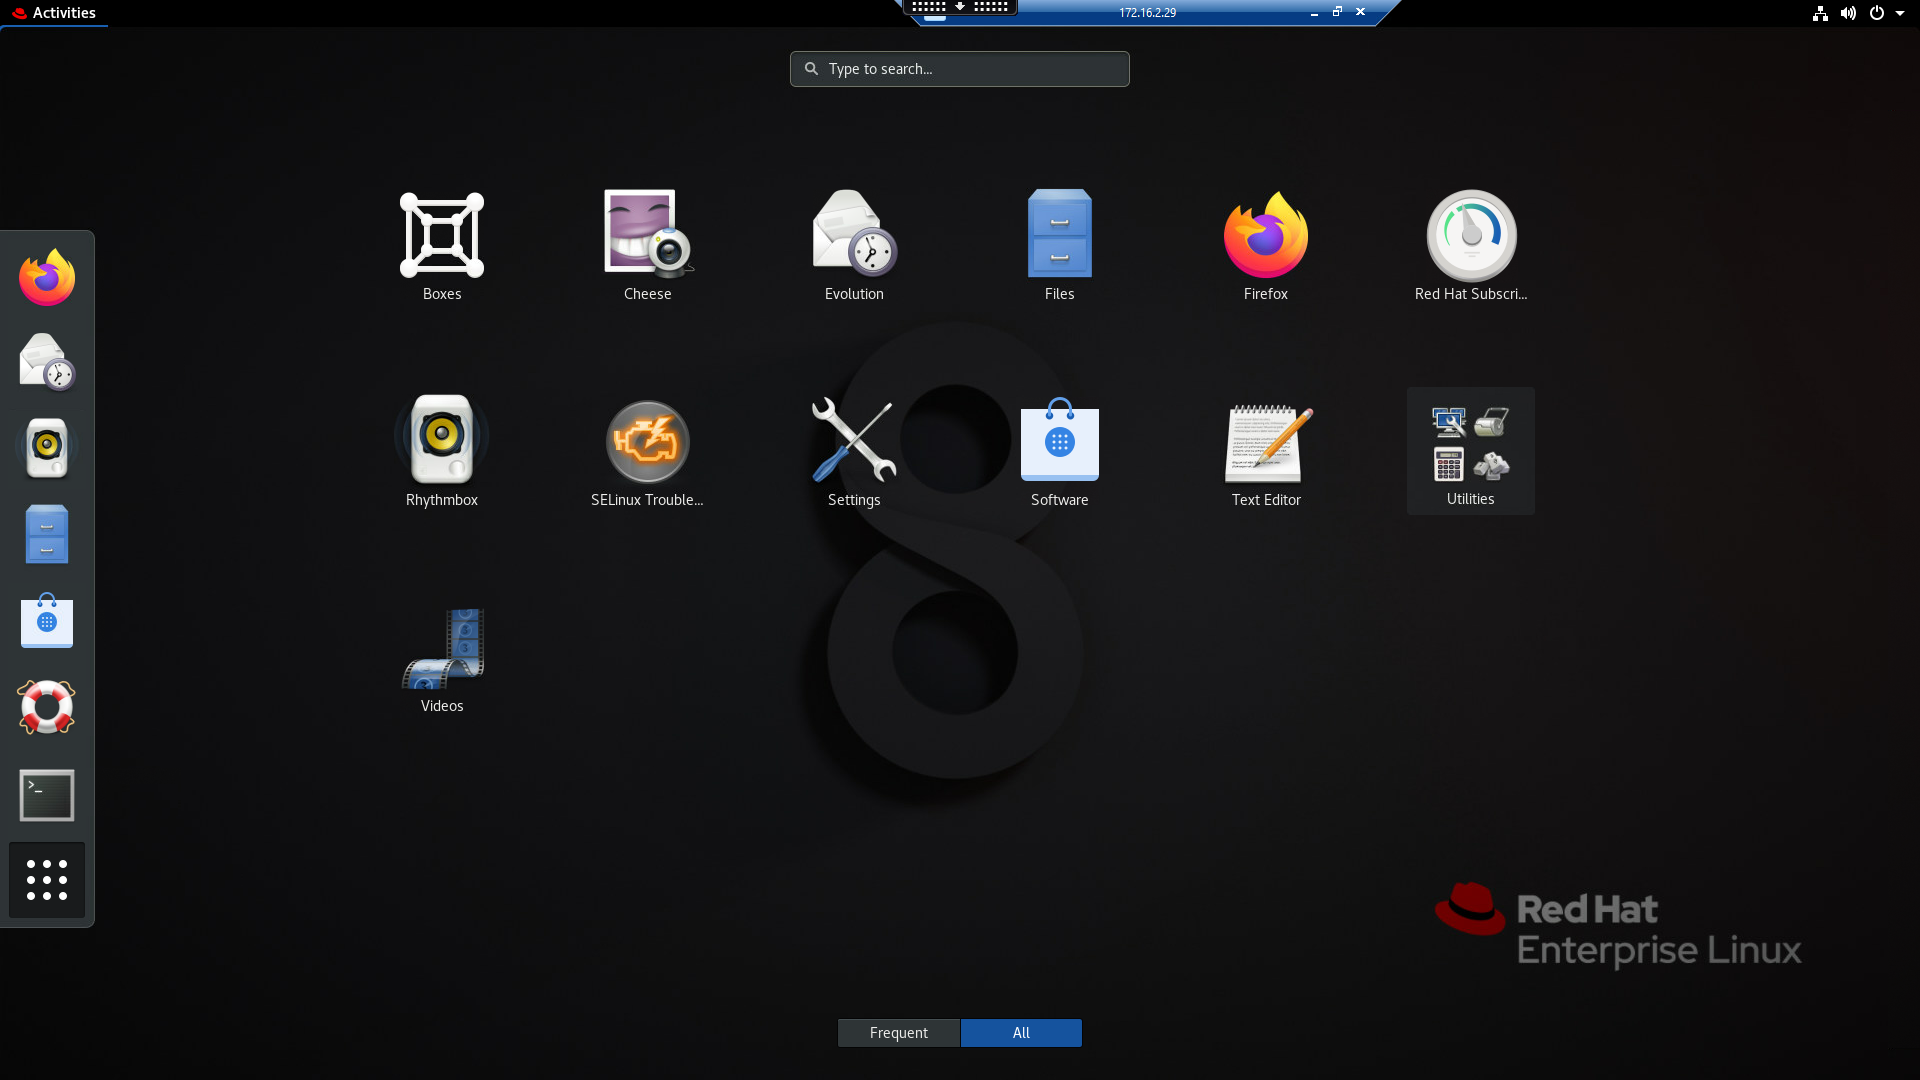
You should see whatever desktop GUI you have installed
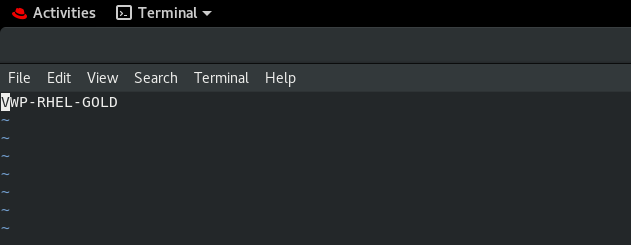
You can continue running the commands required for the next set of configurations either from the Bastion session or by running Terminal from the GUI, the choice is yours.
Joining the domain
Next we need to get the machine joined to our AD domain before we can install the Citrix VDA. There are various ways you can do this and they are all covered in the Citrix documentation, which we will link to at the end. We are using the most common method which is WinBind.
We need to edit a number of configuration files in this process. If you’re unfamiliar with Linux, you can use the vi command to edit text files. You can also use other stuff like vim, or probably stacks of other methods, but vi works fine for me. In vi, when you wish to edit the file you have opened, you need to press <Escape> then <Insert> to enter edit mode. When you are finished editing, you need to press <Escape> then type : w q to save changes, or : q to exit without saving changes. There are many internet guides on using vi and other Linux text editors but hopefully these should be enough to get you through the edits required for joining the domain.
First of all open the hostname file by typing
sudo -s
vi /etc/hostname
The hostname file should simply contain the hostname of the machine, so make sure it is set. If all is well it will already be populated as shown below and you don’t need to edit it. : q will exit the file without saving.
vi /etc/hostsThis file will probably look like this

You will need to edit (Escape Insert) it to look like this, so you are adding both the FQDN of your gold image and NetBIOS name of your gold image as shown in the screenshot.

Save and quit by using Escape : w q – I’m not going to remind you of these keystrokes any more 🙂
Next you should check that your Linux image can resolve the names of your DCs, Cloud Connectors (or DDCs if doing non-cloud) and domain (obviously, substitute the required names as necessary)
nslookup domain.com
nslookup dc1.domain.com
nslookup dc2.domain.com
nslookup connector1.domain.com
nslookup connector2.domain.com
Also check that your time synchronization is working properly (use the date command to view the system time)
Now run this bunch of commands (which may take a while)
sudo yum -y install postgresql-server
sudo yum -y install postgresql-jdbc
sudo postgresql-setup initdb
sudo systemctl enable postgresql
sudo systemctl start postgresql
sudo yum -y install samba-winbind samba-winbind-clients krb5-workstation oddjob-mkhomedir realmd authselect
sudo /sbin/chkconfig winbind on
sudo authselect select winbind with-mkhomedir --force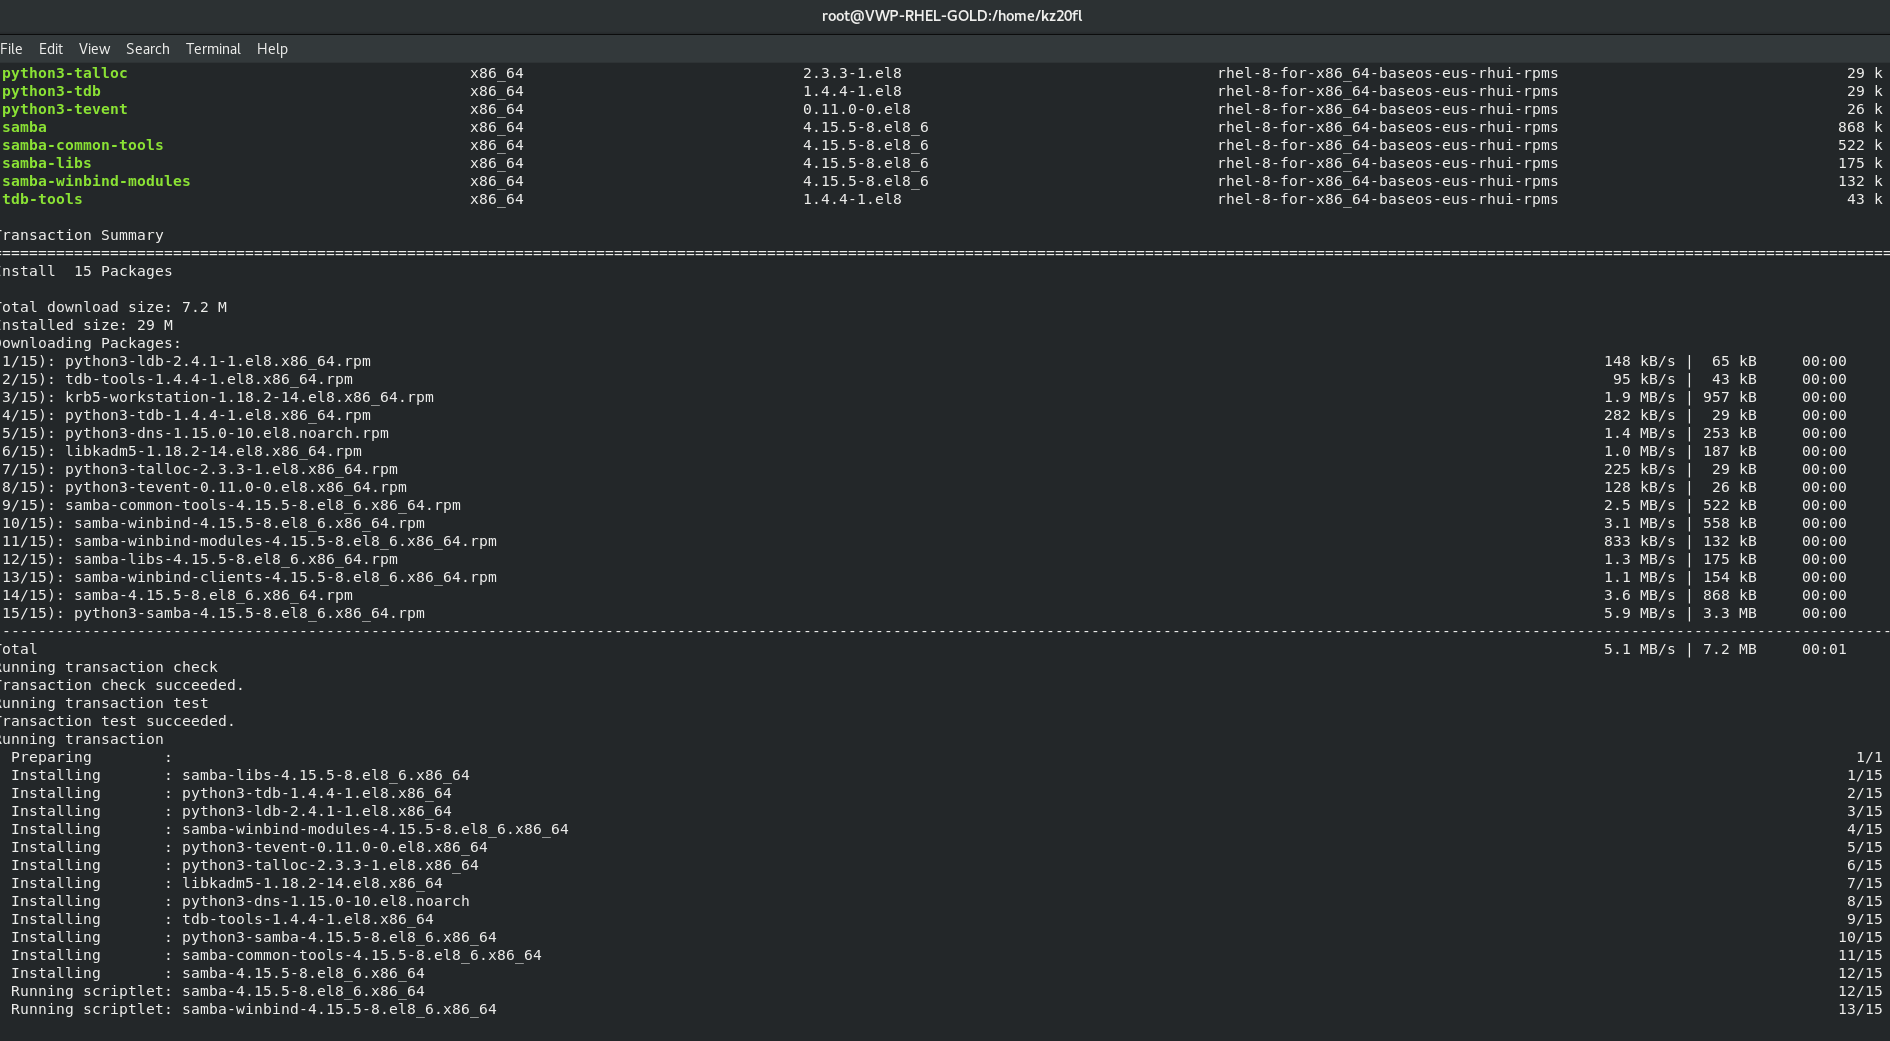
Now let’s edit a whole bunch of configuration files
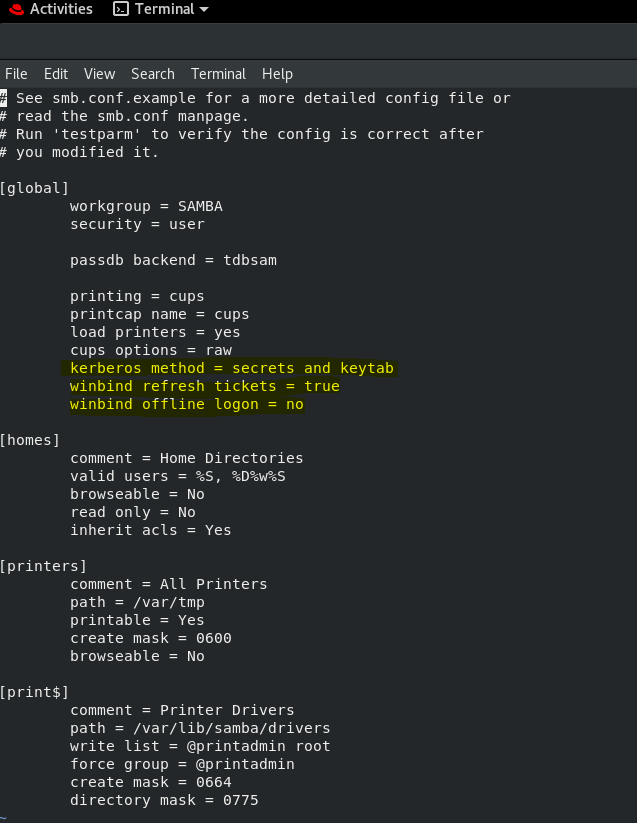
vi /etc/samba/smb.confAdd the lines that are highlighted in the image below
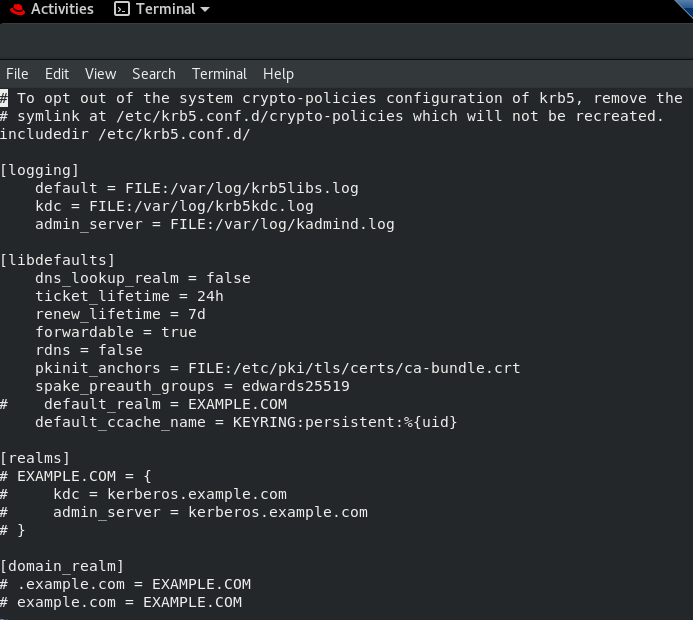
vi /etc/krb5.confHere is what the krb5.conf file looks like by default
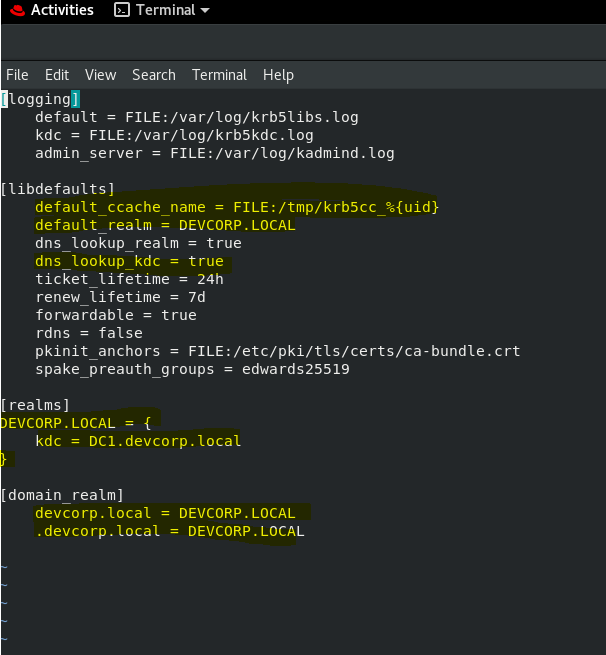
This is what it should look like after you have edited it (highlighted the areas I have changed or added, obviously, insert your own AD domain name instead of mine)
Run the following command, replacing USERACCOUNT with an account that has permissions to join the domain, and DOMAIN.NAME with your AD domain. You don’t need a domain prefix on the user account.
sudo realm join -U USERACCOUNT --client-software=winbind DOMAIN.NAMENow edit this file
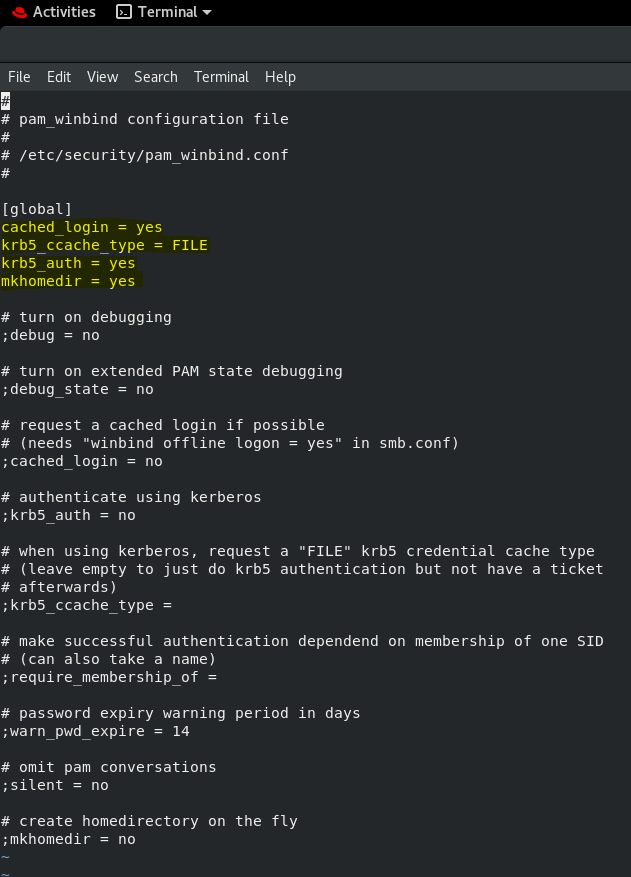
sudo vi /etc/security/pam_winbind.confEnsure all the highlighted lines are present
Restart the service
sudo /sbin/service winbind restartNow you can test the domain join status by running the following commands, the output should be self-explanatory
sudo net ads testjoin
sudo net ads info
You can also test with this command (substituting username and password as required)
wbinfo --krb5auth=DEVCORP\\username%passwordWhich should give you an output something like this

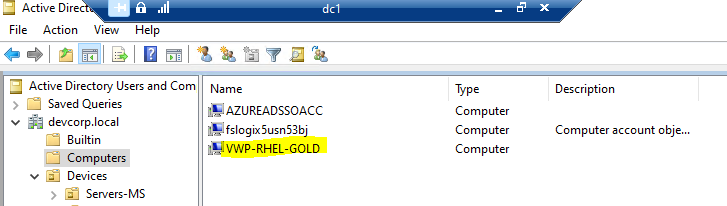
You can also go and check ADUC and see if the account exists in the Computers container (thanks Webster for the correction) which it should. You can also now log in to your Linux machine using domain credentials via RDP.
Installing the Citrix VDA
First of all, install Dot.Net with the following command
sudo yum install dotnet-sdk-6.0 -yNow you need to download the Citrix Linux VDA for your distribution, which in my case is an RPM file. You then need to transfer this file to your Linux machine. Again, loads of ways to do this – I simply connected via RDP with the drives mapped back and then used the Linux VM’s native file manager to connect and copy it.
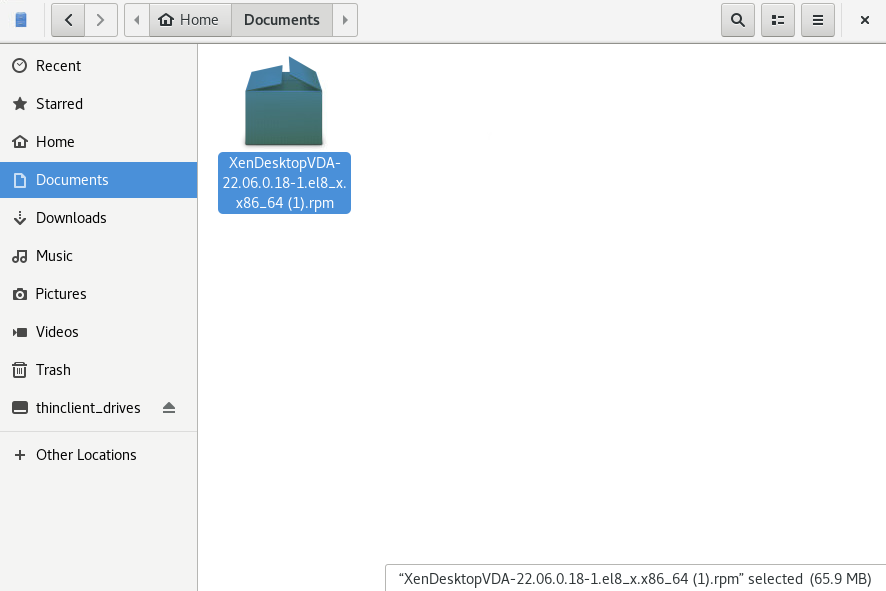
Then simply switch your Terminal/console session to the folder with the RPM file in it, and then run the following command
sudo yum install -y PACKAGENAME.rpm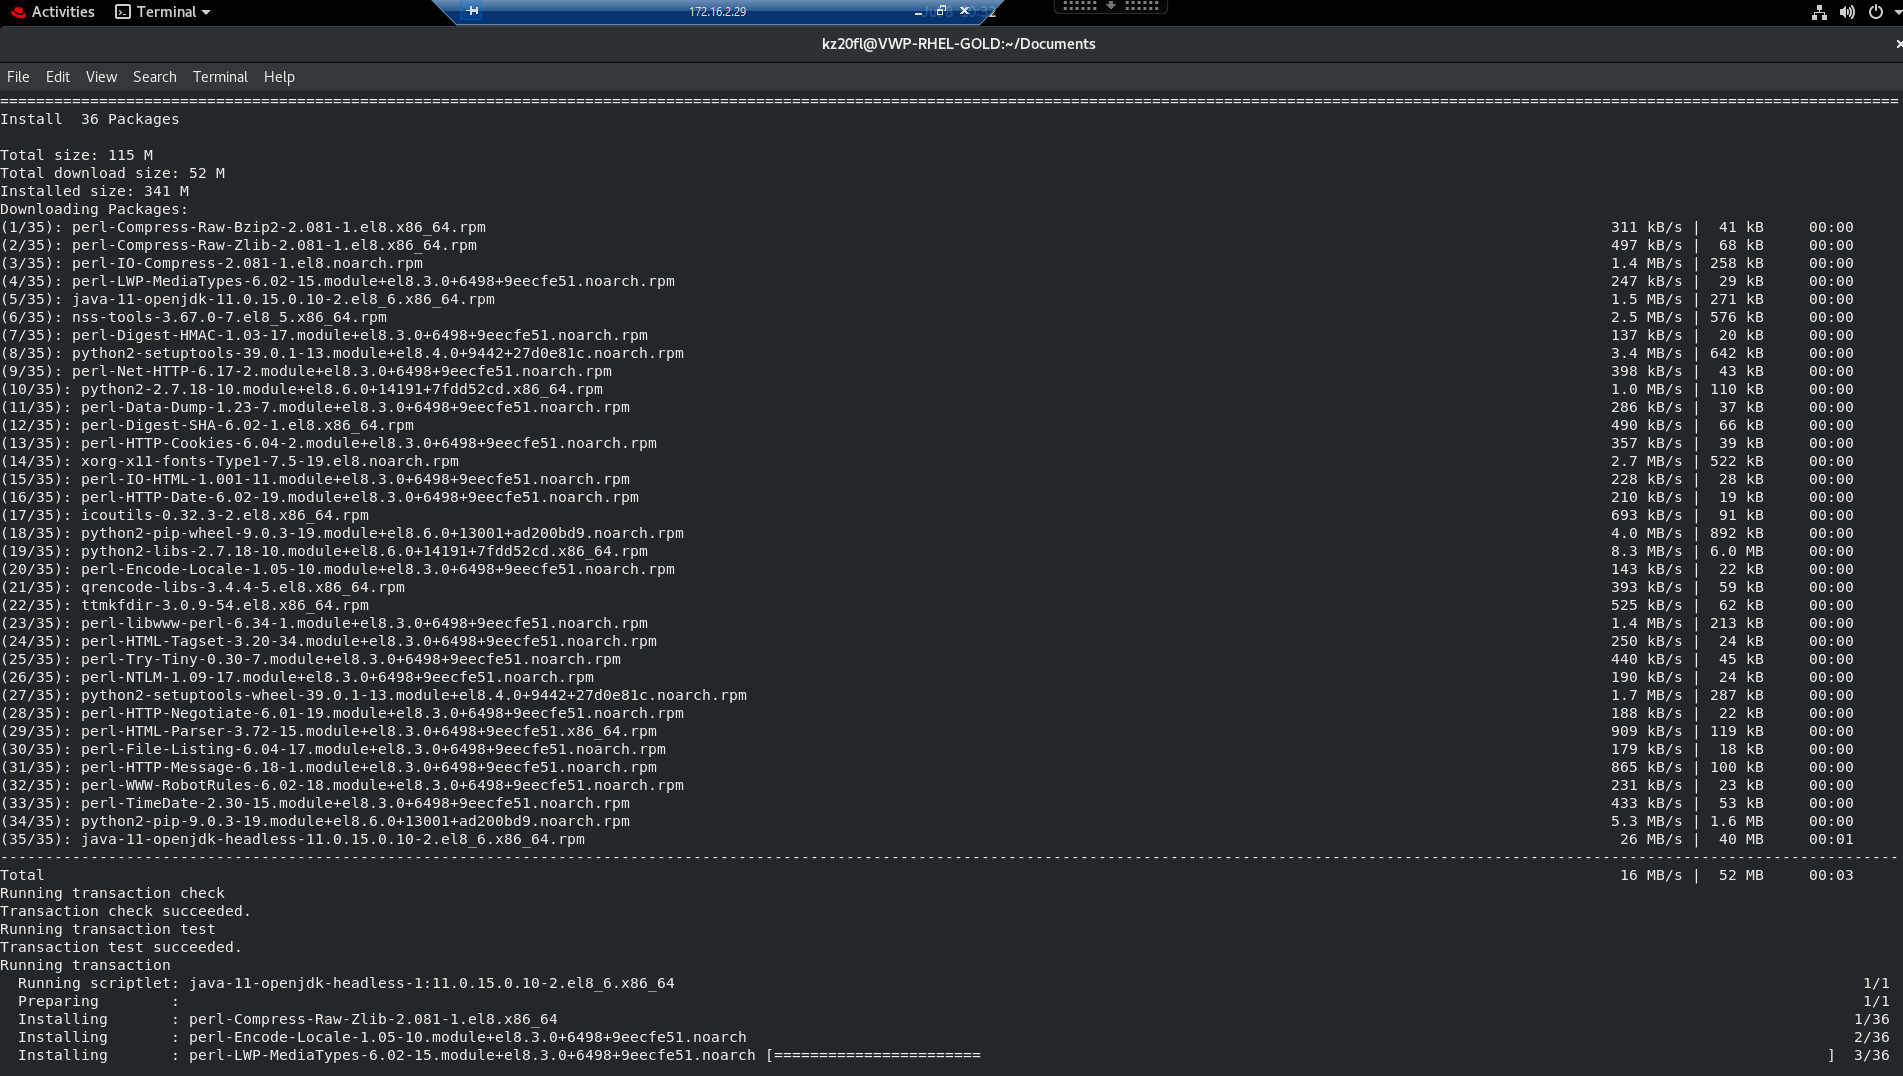
This should install the Virtual Desktop Agent.
Next we need to run a config script
sudo -s
sudo /opt/Citrix/VDA/sbin/ctxsetup.sh
You need to respond to all of the questions, if you require any changes from the defaults. The most important one is the Delivery Controller/Cloud Connector addresses, which should be supplied as FQDNs with spaces as the delimiter. Also make sure you select WinBind as the AD join method.

This section can also automatically open firewall ports and register services to start automatically.
Installing apps and updating
This point would be a good time to install all the applications into the gold image that your users might require. Again, there are many ways to achieve this. You should also apply all available updates from the package manager you are using.
Configuring MCS
You may have noticed during the VDA install that there were no configuration options available for a golden image deployment using MCS or PVS, which feels a bit odd. You need to do this separately. If you’re using MCS like me, then follow these steps.
sudo -s
echo "preserve_hostname: true" > /etc/cloud/cloud.cfg.d/99_hostname.cfg
Now edit the following configuration file
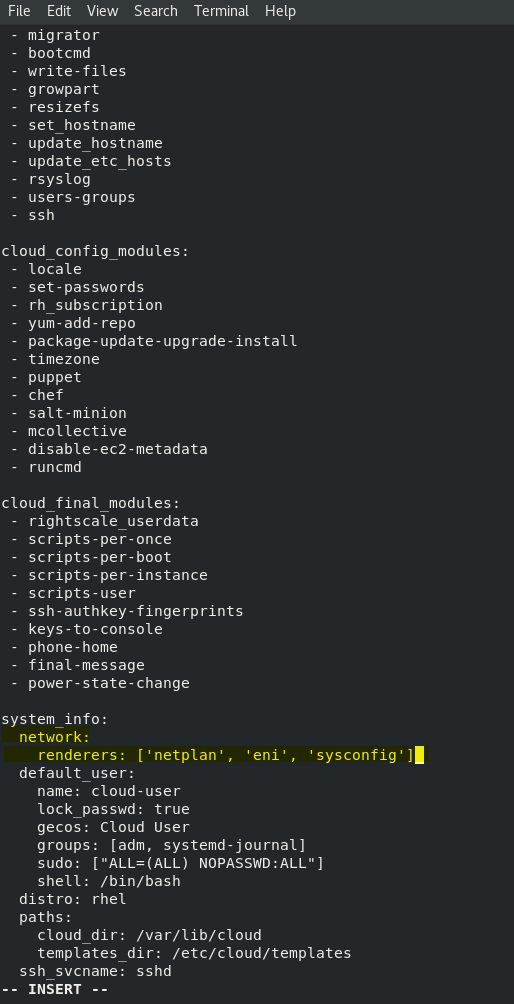
vi /etc/cloud/cloud.cfgAdd the lines highlighted below
Edit this file
vi /etc/xdl/mcs/mcs.confAdd up to 4 DNS servers as shown in the example below and add “winbind” as your integration
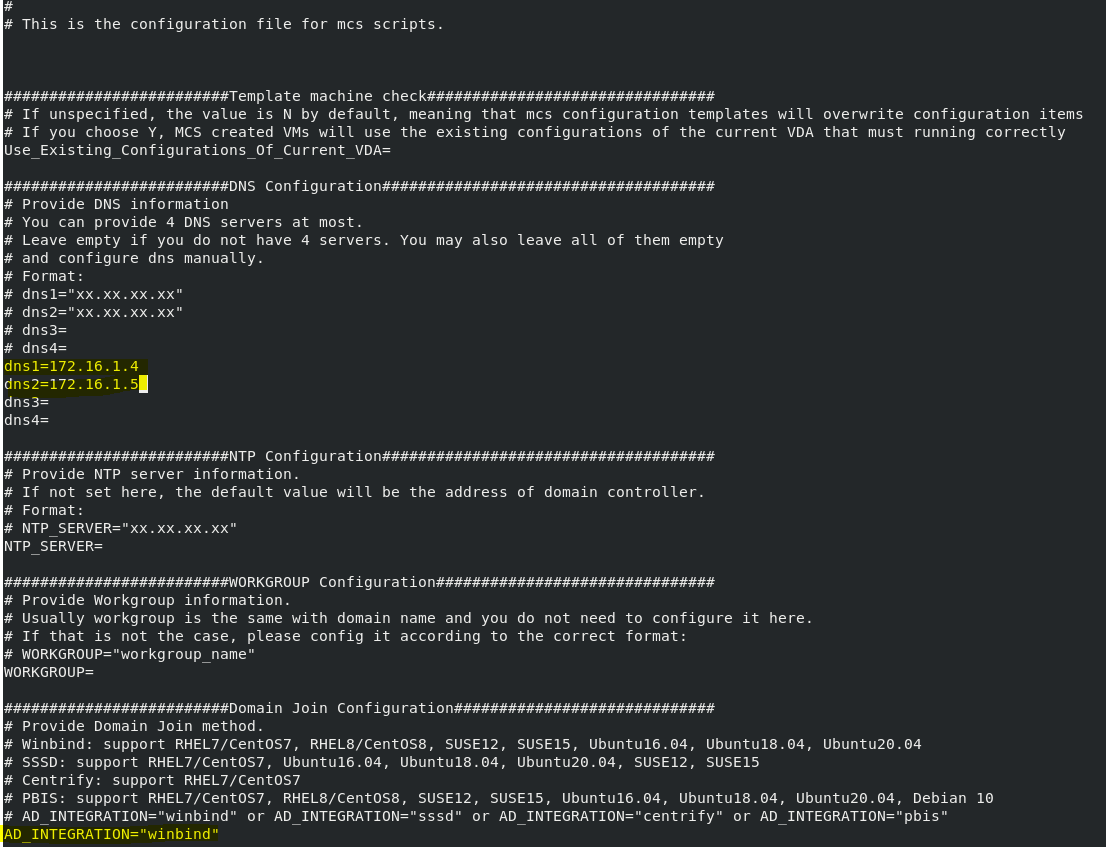
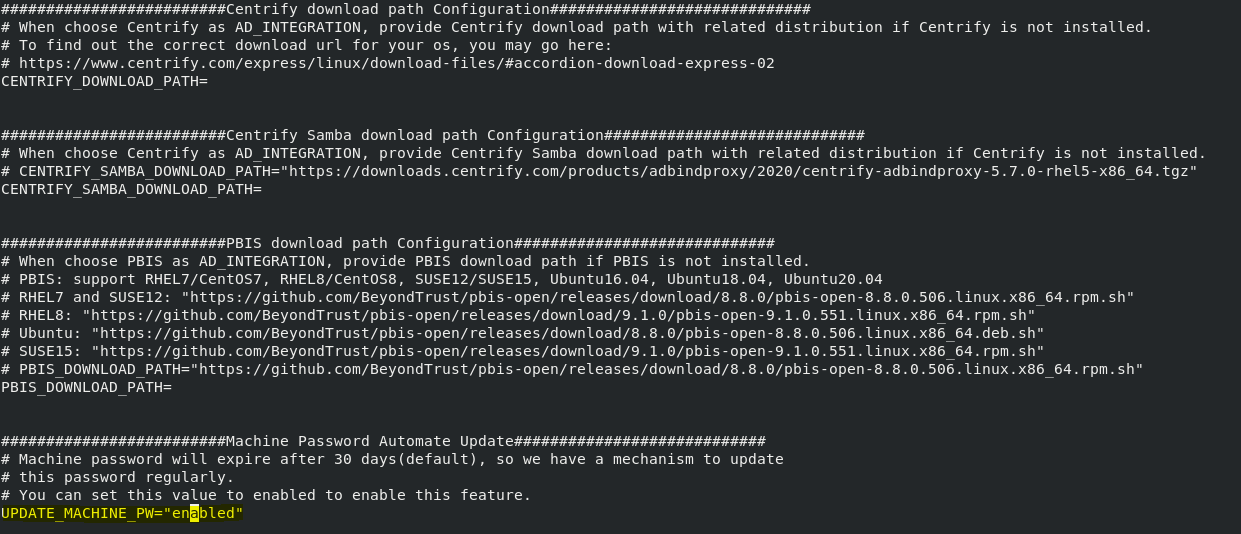
You can also, if required, set the machine password management in this file
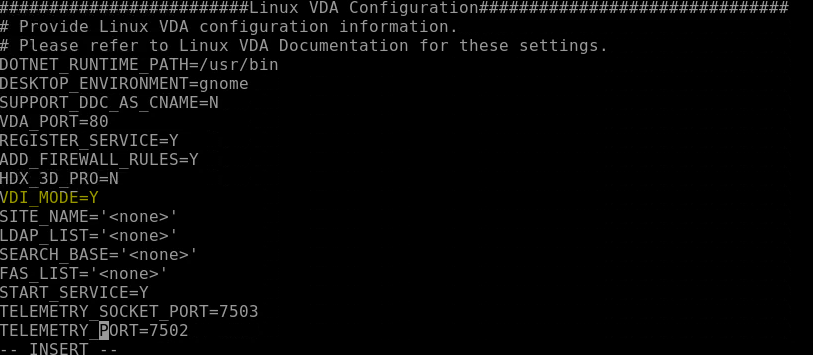
Also pay attention to the setting in the mcs.conf file that says “VDI_MODE”. This needs to be set to “Y” if you are using single-session and “N” if you are using multi-session.
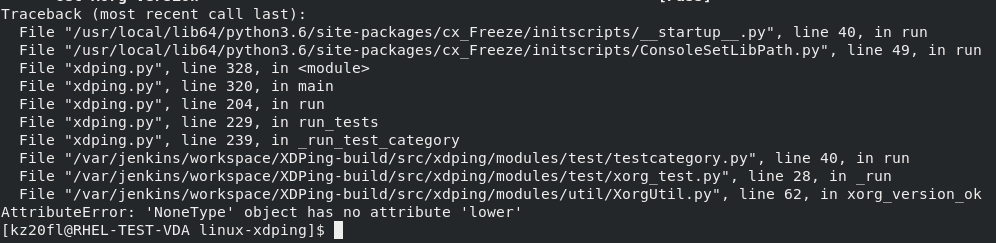
When that is done, run the following script
sudo /opt/Citrix/VDA/sbin/deploymcs.shNote – you will be unable to run xdping (the troubleshooting tool, shown later) until you have run this script. If you get the error shown below running xdping, you have failed to run this script.
Normalization
Like with Windows golden images, you may require some “normalization” routines to ensure that your gold image can produce clones without issue.
Firstly, edit the /etc/hosts file again
sudo vi /etc/hostsDelete everything from this file, so it is blank. When the clones are created, this file will be populated with the right entries for the new system.
Do the same for the /etc/hostname file, clear it of all entries.
Also, make sure any software you have installed, particularly applications that use identifiers and other digital fingerprints like AV, IDS, etc. has been “normalized” according to the vendor guidelines.
It can also make sense to run xdping at this stage (discussed in the troubleshooting section) to see if everything is working as intended.
Now you can shut down the virtual machine, stop and deallocate it, and it is now available for us to work with in terms of adding it to a catalog.
Adding to a machine catalog
This bit will be easy, right?
Ha…..think again. Right at the moment, there are no GUI options for setting up a Linux VDA machine catalog, so you need to do all this in PowerShell. Pretty soon, the options should be added to the Citrix Studio GUI to handle this, so I will update the article when they arrive.
Update 18 July 2022 – at the very least, the Linux license selection is now available in the GUI; I will update the article fully with the changes when I get a chance. For now, see this link – https://docs.citrix.com/en-us/citrix-daas/whats-new.html#july-2022
First you need to get the Citrix PowerShell SDK set up and connected. You can download the SDK from the Citrix site and install it where you can connect to your cloud or on-premises site. If like me you are using cloud, you will need to install it, add the Citrix PS snap-ins and then either run a command or run get-xdauthentication and then sign in with your Citrix Cloud credentials to establish the connection.
Once you are connected to your infra via the PowerShell SDK, we can now start to run the required commands to set up the machine catalog.
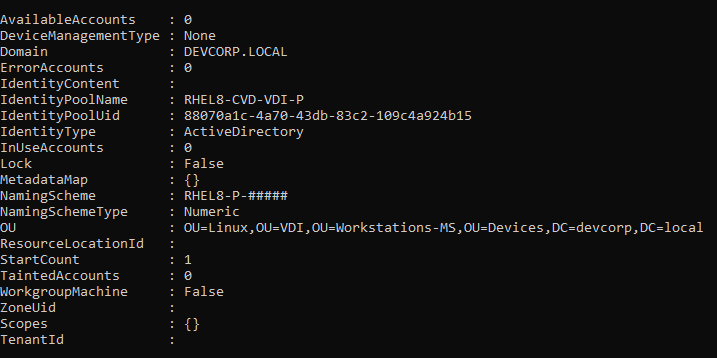
Firstly you need to set up an identity pool, which will tell the catalog which OU to use, the naming format to use, etc. Here is an example command, change this to suit your environment
New-AcctIdentityPool -IdentityPoolName "RHEL8-CVD-VDI-P" -NamingScheme "RHEL8-P-#####" -NamingSchemeType "Numeric" -OU "OU=Linux,OU=VDI,OU=Workstations-MS,OU=Devices,DC=devcorp,DC=local" -Domain "devcorp.local"If you need full documentation of the commands we are using, I have linked them at the end with all of the other collateral. If the command is successful output should be like this
Now to create a new provisioning scheme, and this is the really tricky bit. You need to provide a command running New-ProvScheme with a large set of parameters, a lot of which require full paths to be inputted. Here’s the command I used – you will need to edit this to match your own requirements
New-ProvScheme -ProvisioningSchemeName RHEL8-CVD-VDI-P -HostingUnitName 'DevCorpTenant WORKPLACE-Clients-01' -IdentityPoolName RHEL8-CVD-VDI-P -ServiceOffering 'XDHyp:\HostingUnits\serviceoffering.folder\Standard_D4s_v5.serviceoffering' -NetworkMapping @{"0"="XDHyp:\HostingUnits\WORKPLACE-Clients-01\West Europe.region\virtualprivatecloud.folder\West Europe.region\virtualprivatecloud.folder\WORKPLACE-vnetclients-01-westeurope.resourcegroup\WORKPLACE-clients-01-westurope.virtualprivatecloud\Clients01CTOAVD.network"} -MasterImageVM 'XDHyp:\HostingUnits\DevCorpTenant WORKPLACE-Clients-01\image.folder\rg-westeurope-avd-wkpc-service-objects.resourcegroup\VWP-RHEL-GOLD_OsDisk_1_746a0ccc14b949e5bc7fc17f80ef56c0.manageddisk' -CustomProperties '<CustomProperties xmlns="http://schemas.citrix.com/2014/xd/machinecreation" xmlns:xsi="http://www.w3.org/2001/XMLSchema-instance"><Property xsi:type="StringProperty" Name="UseManagedDisks" Value="true" /><Property xsi:type="StringProperty" Name="StorageType" Value="Premium_LRS" /><Property xsi:type="StringProperty" Name="ResourceGroups" Value="rg-westeurope-avd-wkpc-service-objects" /><Property xsi:type="StringProperty" Name="LicenseType" Value="RHEL_BYOS" /><Property xsi:type="StringProperty" Name="SchemaVersion" Value="2" /><Property xsi:type="StringProperty" Name="OsType" Value="Linux" /></CustomProperties>'HostingUnitName and IdentityPoolName are easy enough to provide – you already created the IdentityPoolName previously, and you can get the HostingUnitName simply by running this command
dir XDHyp:\HostingUnits | select HostingUnitName The other parameters though, particularly ServiceOffering, NetworkMapping and MasterImageVM may take a bit of trial and error. You can get some of the details from Azure (if running in cloud) and some from using the dir command as shown above (dir XDHyp:\HostingUnits and dir XDHyp:\Connections will help provide some of them). If you get any of them wrong, the output you see should provide a Terminating Error field as shown below so you can track down which parameter you have wrong. This particular example indicates that we haven’t enabled Red Hat Cloud Access, which was the very first step. If there is a problem with one of the parameters it should be shown in the same way.

Pay attention also to the CustomProperties section, which provides an XML file with certain parameters in there that you may recognize and can possibly use or edit. Of particular importance are the “OsType” (which should be “Linux”) and “LicenseType” (which should be “RHEL_BYOS” or “SLES_BYOS” dependent on your Linux version). The full set of possible custom properties is discussed in one of the links provided in the collateral section at the end of this article and should provide all of the possible values as required.
When you run the New-ProvScheme command this will take quite a while to complete. If successful, you should see the following output

Now that we have the provisioning scheme, before we can create a catalog, we need to get the scheme’s UID. Run this code to find it (obviously substituting the required name into the command)
(Get-ProvScheme -ProvisioningSchemeName "RHEL8-CVD-VDI-P").ProvisioningSchemeUIDThen make a note of the UID and add it to the parameter ProvisioningSchemeId (yes, annoyingly the property is called ProvisioningSchemeUID and the parameter is called ProvisioningSchemeId, minus the ‘U’). My command is shown below
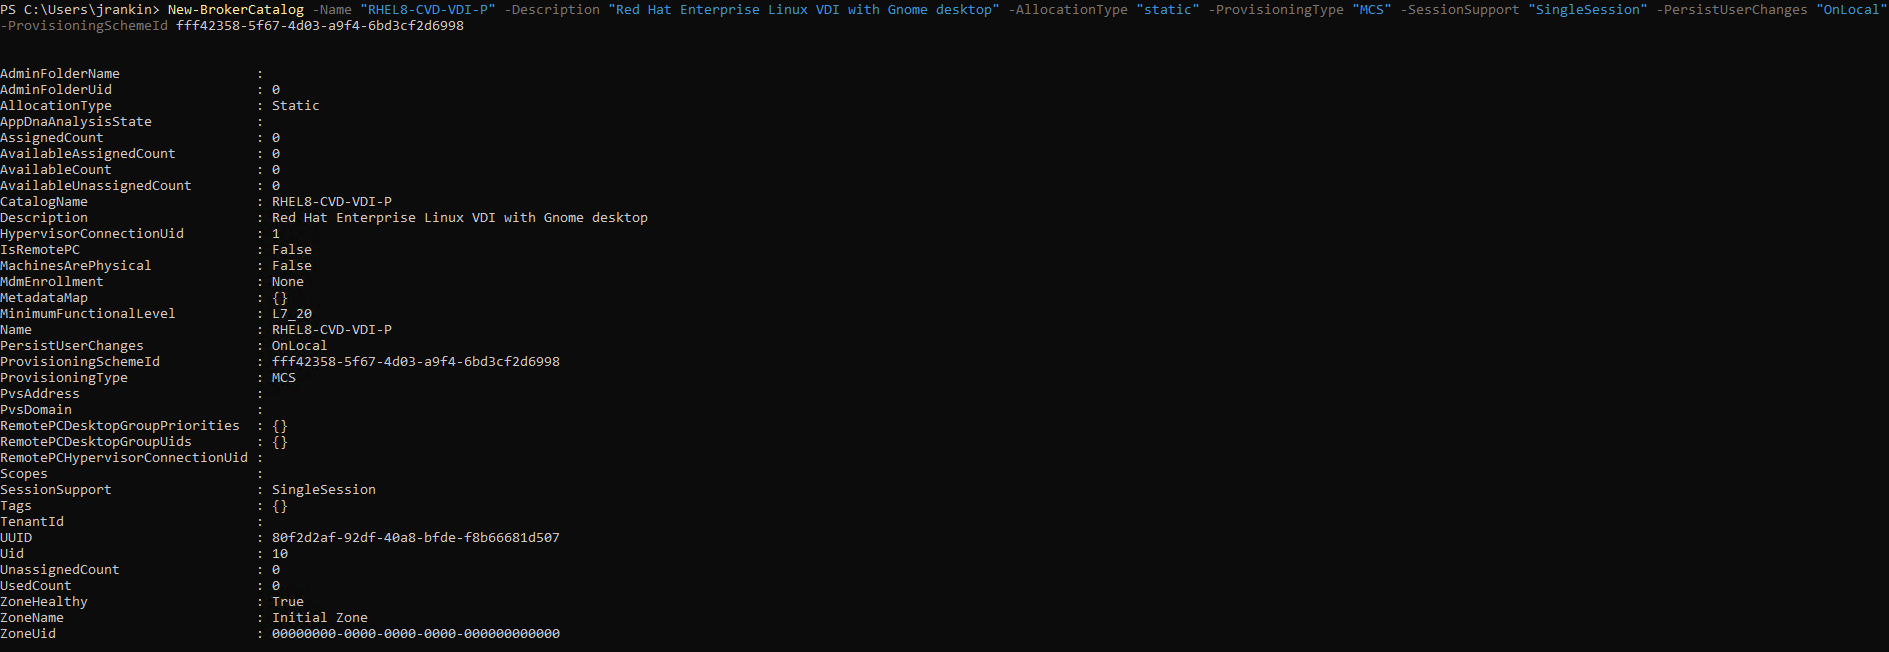
New-BrokerCatalog -Name "RHEL8-CVD-VDI-P" -Description "Red Hat Enterprise Linux VDI with Gnome desktop" -AllocationType "static" -ProvisioningType "MCS" -SessionSupport "SingleSession" -PersistUserChanges "OnLocal" -ProvisioningSchemeId fff42358-5f67-4d03-a9f4-6bd3cf2d6998Again, change this as required for your environment.
If the command is successful, you should see this output
But most importantly, you should now see a new catalog in Citrix Studio! Note that if you ever delete the catalog through Studio, this will also delete the provisioning scheme and identity pool as well, so you would need to recreate all of the items from scratch.

Now, you should be able to add machines to the catalog which will be pulled from the details you provided when you created the Identity Pool.
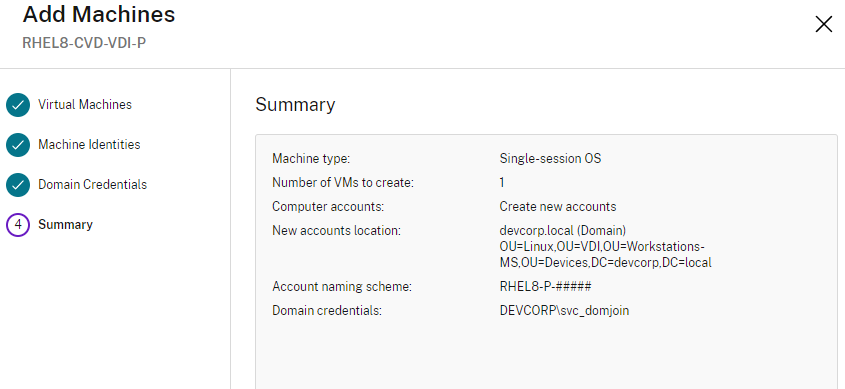
This should provision machines in the volumes required using MCS, in the way you are probably familiar with.
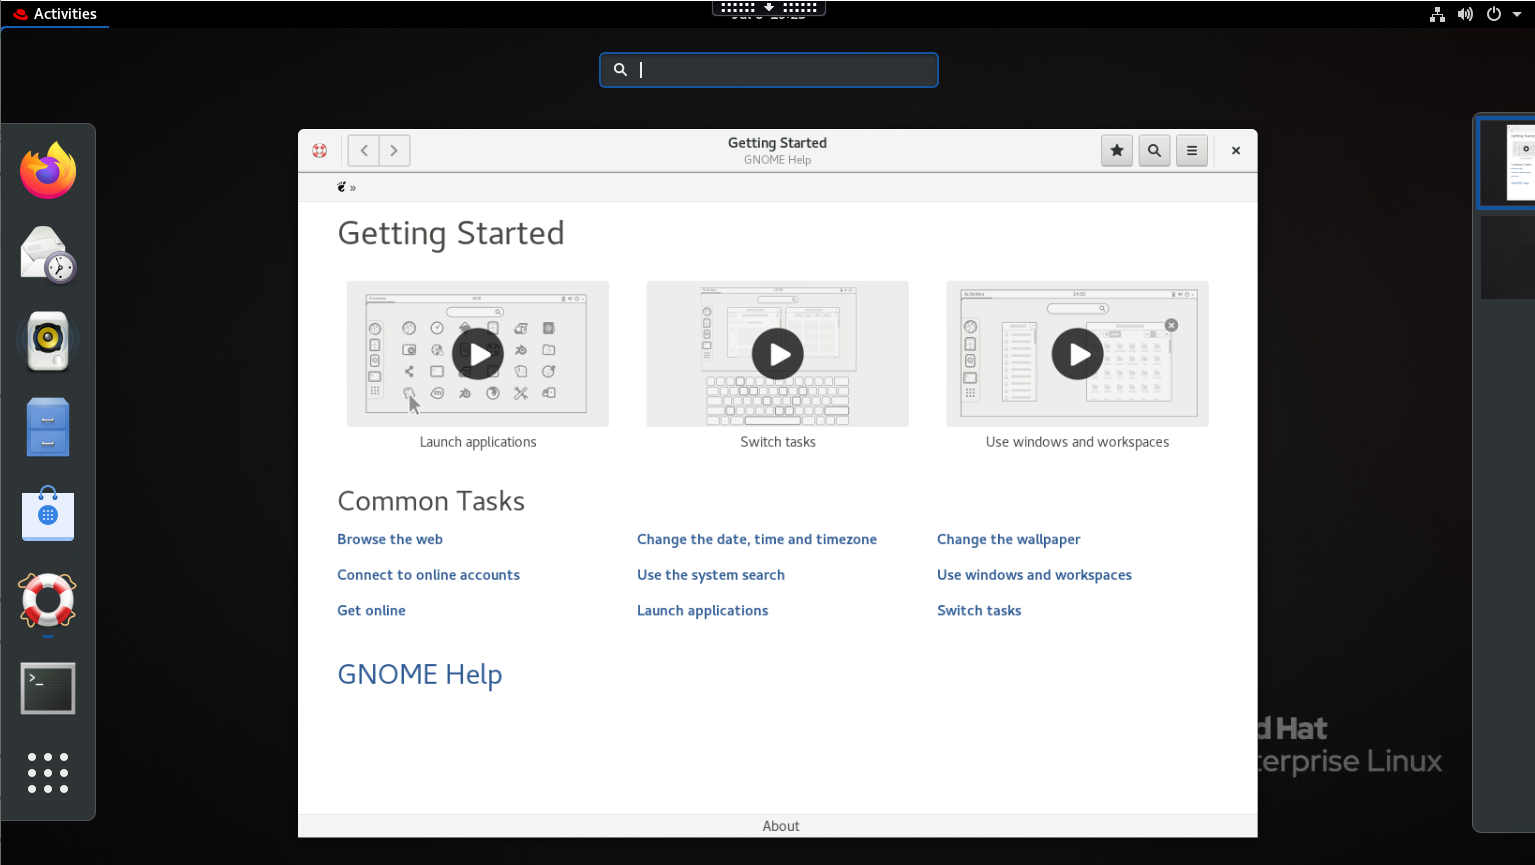
Once they’re created, you can then add your new machines to a Delivery Group and make apps or desktops available to your target users and groups.
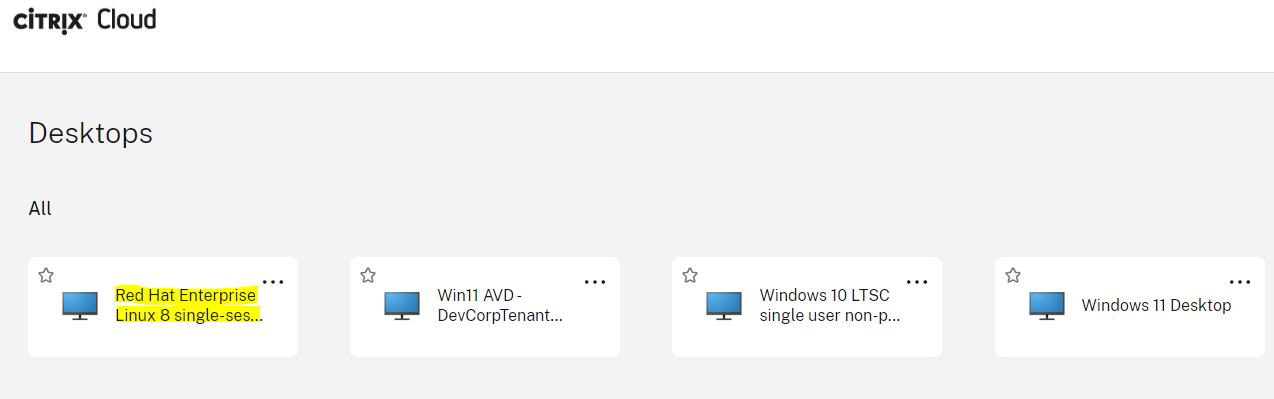
Here’s the desktop delivered via Citrix. I hope it was worth it!
Troubleshooting
If you’re experiencing issues with Linux VDAs, particularly around registration with Cloud Connectors or Delivery Controllers, the xdping tool is what you need. You can download it from Citrix via this link – https://support.citrix.com/article/CTX202015/linux-xdping-tool. It comes as a tar file, so once you have placed it on your system just run the following commands to unpack and run it
tar xvf linux-xdping.tar
cd linux-xdping
sudo bash install.sh
Then you can simply run the tool by running sudo xdping and it should give you some handy output at the end as to whether there are any issues detected.
Normally, if you’re struggling, I’d suggest checking the smb.conf and krb5.conf files as these can often become overwritten.
If you need to check the VDA logs (especially with registration issues), the logs are in the folder /var/log/xdl and should have a .log suffix with the date and time of when the VDA first started in the name. Open this file with vi and scroll to the end to see the latest errors.
Summary
Setting up a Linux VDA is a bit intimidating if you’re used to handling Windows machines in Citrix. Hopefully, this guide should help you get over some of the problems.
A very interesting thing I noticed is that the Linux VDA sets up a lite database to recreate the layout of the Windows Registry for the Citrix settings. If you switch to the /opt/Citrix/VDA/bin folder you can use the ctxreg command (which is kind of similar to reg.exe) to view it. For instance, this command would show you the data for the ControllerRegistrarPort value in the database (which is the comms port the VDA is using).
./ctxreg read -k HKLM/Software/Citrix/VirtualDesktopAgent -v ControllerRegistrarPortYou can view the whole “key” as it is, by using
./ctxreg list -k HKLM/Software/Citrix/VirtualDesktopAgentPlease, please don’t fire lots of comments at me regarding Linux – I’m not really a penguin person, so my knowledge is fairly limited.
Collateral
Here are the links to sites I’ve used throughout the compilation of this guide:-
https://docs.citrix.com/en-us/linux-virtual-delivery-agent/current-release/installation-overview/redhat.html
https://docs.citrix.com/en-us/citrix-daas/install-configure/resource-location/azure-resource-manager.html
https://docs.microsoft.com/en-us/azure/virtual-machines/linux/azure-hybrid-benefit-linux
https://developer-docs.citrix.com/projects/citrix-virtual-apps-desktops-sdk/en/latest/Broker/New-BrokerCatalog/
https://developer-docs.citrix.com/projects/citrix-virtual-apps-desktops-sdk/en/latest/ADIdentity/New-AcctIdentityPool/
https://developer-docs.citrix.com/projects/citrix-virtual-apps-desktops-sdk/en/latest/MachineCreation/New-ProvScheme/
https://www.citrix.com/blogs/2022/02/03/getting-started-with-powershell-automation-for-citrix-cloud/
https://stevenlemonier.fr/how-to-create-an-mcs-catalog-in-powershell/
https://support.citrix.com/article/CTX202015/linux-xdping-tool
https://www.citrix.com/blogs/2015/10/21/troubleshooting-linux-vda-registration-issues/
Hopefully they might be useful to you too!
![]()